Pluvium uses photoshop exclusive tools
- Value Histogram
- Eyedropper average sample
Pluvium - Lines
- Lines, much like blocking in, are a way to get information down before committing to a rendered piece. He uses it to get more complicated perspective, objects, and anatomy down, they don’t necessarily have to be clean(that’s not the point here). Smooth edge → used for blocking in thick lines Line directional bias exercise. Leverage the area you are more dominant in by rotating the canvas Rough line quality does not necessarily mean the overall composition is bad.
Pluvium - Brushes
- Hard brush/airbrush: He changes the softness to get an airbrush on demand, it’s technically one brush standing in as 3 depending on the softness.
- Hard + soft edge brush
- Whatever/Grandis: A form of texture brush
Conveying material is not just textured brushes but lighting theory as well. The actual brush tutorial is on photoshop
Pluvium - Shapes
Shapes are more important than line quality.
- The uncanniness of “upgrading” a sketch is due to the shape depiction lost in cleaning a lineart.
Definition of shapes
Connecting lines or blocking creates shapes. Shapes have patterns or rhythms. Smaller shapes can insert themselves to disrupt the rhythm as details for the composition. When analyzing references, start using a hierarchy of shapes. (Smaller as there are more details)
- In addition, shapes are placed relative to themselves and landmarks(To be determined).
- Starting from the details or anatomy ignores the overall composition which can introduce errors. Create the shapes first, then fit those details into the shapes. For blocking in, pluvium seems to use slopes and negative space to create his shapes.
Shape Breakdown
Perspective
Focus on accuracy and correctness. Also needed to depict light and how objects interact with each other.
A common misconception
Every object has its own vanishing point. That is, two boxes can have 3 point and 2 point perspective in the same scene. Only share vanishing points if you explicitly want the objects to be parallel (e.g. in cityscapes of parallel buildings).
Why perspective matters
It allows you to deeply study the construction of an object to be applied broadly, not just the silhouette. A general theory that works for all, rather than fixed items committed to memory.
You can design your own light with relatively correct perspective
Perfection is not needed
It just has to look correct. What is needed is the knowledge to diagnose and fix the uncanny valley of perspective from a few grounded rules (e.g. parallel lines of a box must converge, a cylinder must have no corners). The execution though, doesn’t necessarily have to be perfect if it looks fine.
Adding details to shapes
Pluvium goes over common forms(cube, cylinder, sphere, cone) present in all shapes which have recognizable and distinct guidelines. Using knowledge from the contours of common forms can give a lot more information about the shape. (This step is done AFTER the outline is done, without considering detail yet)
Drawing the hand
Most tutorials start by placing some box as the palm “base”. Pluvium starts from a non-distinct finger shape to anchor the rest of the shapes. Additional use of perspective is used to inform details of the fingers(the cylinder contours inform the creases). Also used as a problem-solving tool to determine hidden faces and continuity.
Values
Contrast and texture help separate objects from the background Something about light direction and tangent lights
- For cylinders, light will hit a spot and “fall off” compared to cubes that illuminate the whole surface
Pluvium groups values into “collections”, which contain varying ranges classified into low or high contrast
 Low contrast(character). High contrast(noise, to the left). The nonsensical noise makes the character stand out more.
You can manufacture your own light source.
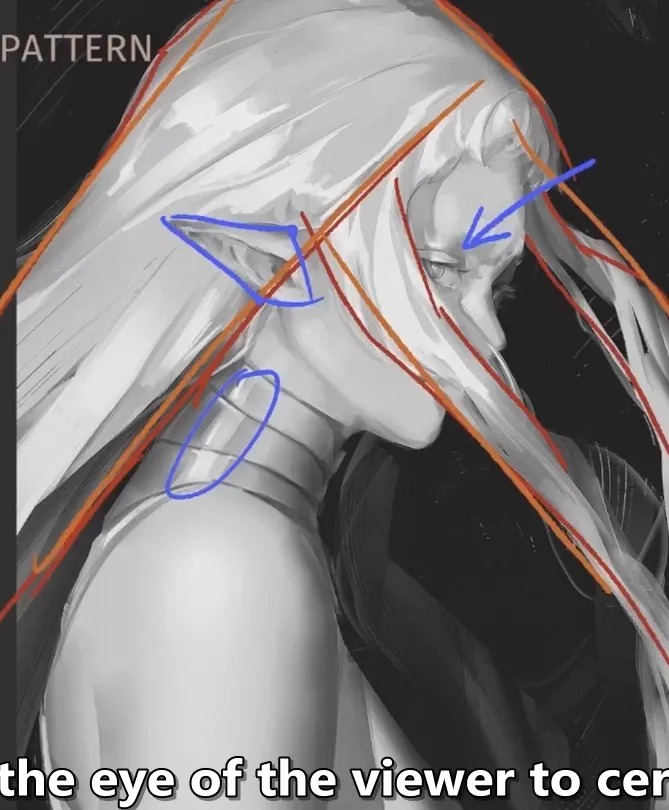
Composition design
It helps to add high contrast areas to the rule of thirds. You can probably section off collections as their own shape.
Lighting and Shadow
Decided based on relative understanding perspective.
- Bounce light and cast shadow rely on perspective and are more important overall. Subsurface scattering can be more stylistic since it doesn’t really rely on forms as much. Multiply layer can be used for stylized shadows.
Color
KEYWORDS: High saturation terminators Saturation also alters values, but it has limitations. You can’t get a fully saturated white or black, some of that value is lost in the conversion. The triangle depicts this concept, so use it instead of the square. This means stronger lights and shadows tend to carry less saturation info.
- High saturation is thus placed in terminator shadows/midtones/sss
- Pay attention to how bounce light creates these areas. You also can’t make a fully saturated color a bright light. Moving the values slightly up and color dodging works well though.
- A bright red light is actually a white value surrounded by a saturated terminator shadow. TLDR you have to show the surroundings getting affected for the viewer to understand its color. You can use colors randomly even if it defies realism, but consistently.
- Saturation can take the place of values in some form and compositional elements.
 The white light kills the saturation for the clothes. Much of the saturation is left to hair and skintone instead.
Section 4 Studying
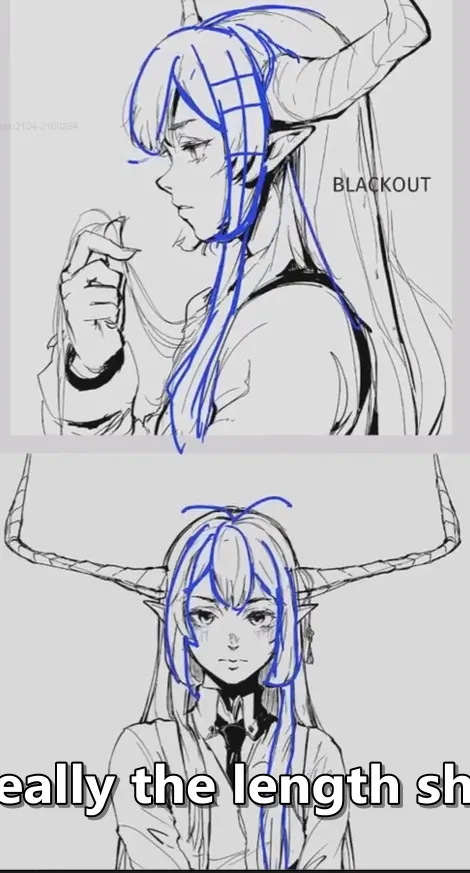
Lighting And Hair
First find the direction of the light, then planes that may be affected depending on where they face.
- Each hair strand is a ribbon that has planes that can be affected.
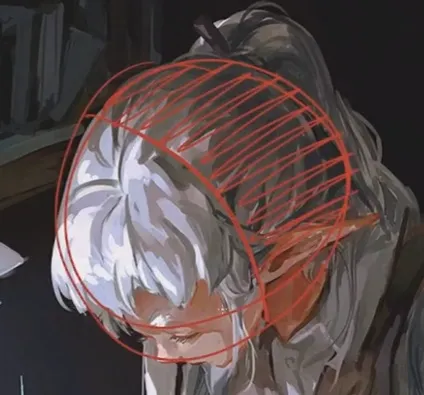
- The head can be simplified to a sphere to determine how to distribute light
The head is a sphere
Front view hair translated to side